Creating a Kubernetes cluster isn’t a simple task. While many managed solutions from cloud providers can simplify the process, after receiving a massive bill for an EKS cluster, I decided to build a cost-effective yet automated solution for a self-managed Kubernetes cluster. By using GitHub Actions, Terraform, and Ansible, I developed a streamlined method to quickly spin up a Kubernetes cluster with minimal manual configuration.
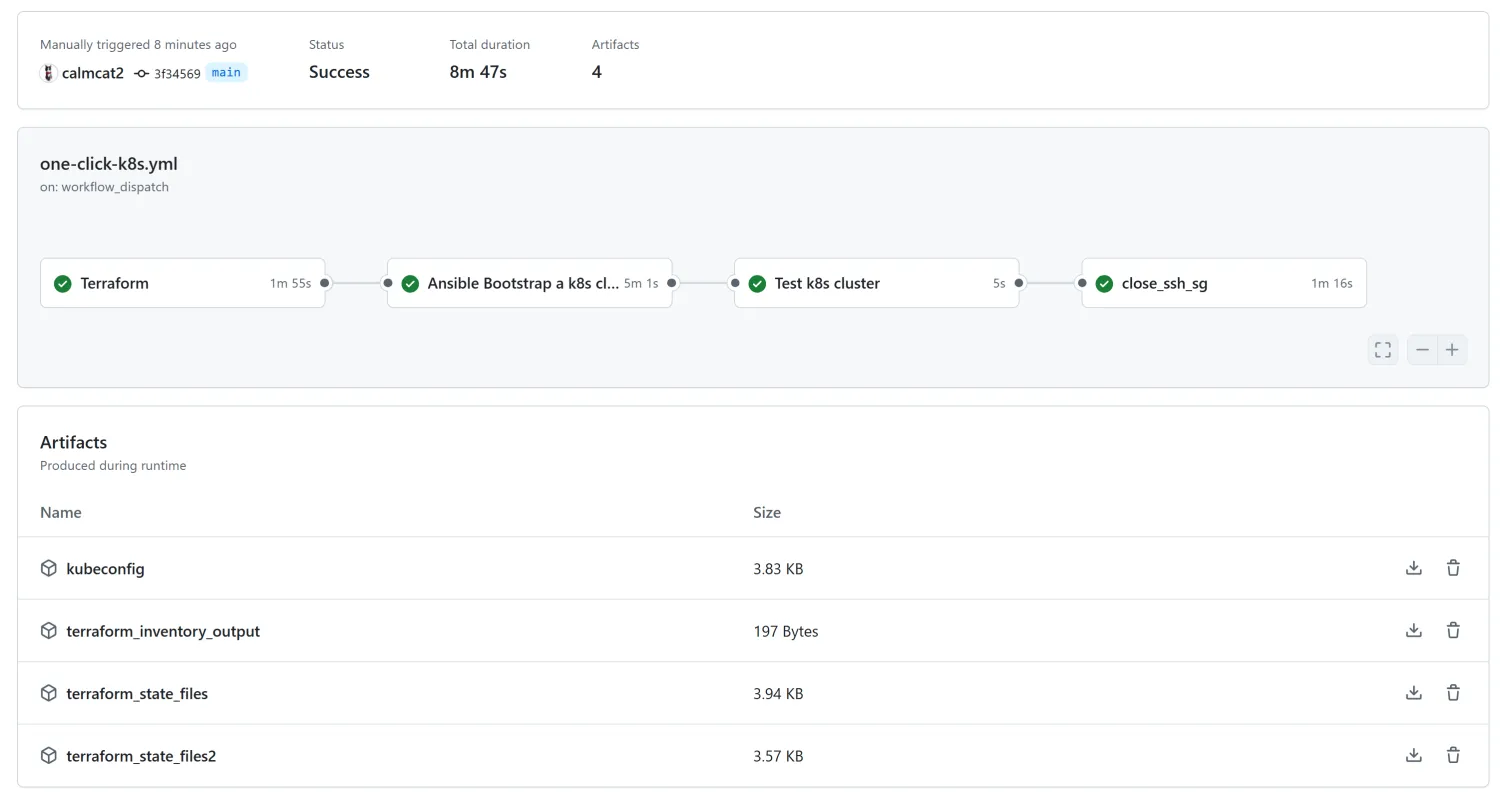
The diagram above illustrates the automated process for deploying a Kubernetes. GitHub Actions orchestrates the entire workflow, executing each stage in sequence:
Terraform (Infrastructure Provisioning):
Terraform provisions the necessary networking components and EC2 instances required for the Kubernetes cluster.
Ansible (Cluster Configuration):
Ansible configures the nodes, sets up the Kubernetes cluster on the master node, and joins the worker nodes to the cluster.
Testing (Cluster Health Check):
A series of tests are run using kubectl to ensure that the Kubernetes cluster is healthy and all core components are functioning correctly.
Terraform (Security Enhancement):
Finally, Terraform closes the SSH ports on all nodes to enhance security. If needed, SSH access can be re-enabled later through security group modifications or use AWS Systems Manager (SSM) to access the instances.
Prerequisites
To run this workflow, you need to have a few things in place:
Repository Setup: You should copy this repository and create your own. It is highly recommended to use a private repository since all artifacts will be publicly accessible in a public repository.
AWS Credentials: You will need AWS user credentials (Access Key ID and Secret Access Key) with appropriate EC2 permissions. The minimum required permissions are detailed in the aws_iam_policy.json file within the repository.
SSH Key: Generate an SSH key in AWS and save the private key in .pem format. Add this key to your repository secrets.
Add the credentials and ssh key in the repository secrets as below:
Workflow Code Breakdown
At the start of the workflow, a few customization options are provided. These allow you to define parameters like region, number of worker nodes, machine types, and SSH key names. The workflow is triggered manually using on: workflow_dispatch.
on: workflow_dispatch: inputs: region: description:'Default region to create all resources (def. us-east-1).' required:false default:'us-east-1' type:string num_workers: description:'Number of worker nodes to be provisioned (def. 1).' required:false default:1 type:number master_machine_type: description:"Machine type of the master node (def. t2.medium)." required:false default:'t2.medium' type:string worker_machine_type: description:"Machine type of the worker node (def. t2.medium)." default:'t2.medium' required:false type:string ssh_key_name: description:"Name of the ssh key pair to be used for the EC2 instances." required:true type:string
Next, we grant read permissions to all jobs so they have access to the files in this repository. In the first job, GitHub Actions uses a Terraform setup provided by HashiCorp’s official action. Terraform provisions all necessary AWS resources such as VPCs, subnets, security groups, and EC2 instances for both master and worker nodes.
Once provisioning is complete, Terraform uploads the state file and an inventory file as artifacts for use in subsequent steps.
After infrastructure provisioning is complete, Ansible takes over to configure the Kubernetes cluster. It downloads the inventory file artifact created by Terraform and uses it to configure both master and worker nodes.
Ansible installs Kubernetes components on each node, initializes the cluster on the master node, and joins worker nodes to it. Once completed, it transfers the kubeconfig file from the master node and uploads it as an artifact.
Next, a few kubectl commands are executed in a new job to ensure that everything is running smoothly using the provided kubeconfig file. This includes checking API server health, node readiness, system pod status, and component status.
steps: -name:Obtainkubeconfig uses:actions/download-artifact@v4 with: name:kubeconfig path:~/.kube -name:SetKUBECONFIGenv id:kubeconfig run:| chmod 600 ~/.kube/kubeconfig echo "KUBECONFIG_DATA=$(cat ~/.kube/kubeconfig | base64 -w 0)" >> $GITHUB_OUTPUT -name:Kubectltoolinstaller uses:tale/kubectl-action@v1 with: base64-kube-config:${{steps.kubeconfig.outputs.KUBECONFIG_DATA}} kubectl-version:v1.31.0 -name:CheckClusterHealth run:| # Check API Server health ls -la ~/.kube/kubeconfig if ! kubectl get --raw='/readyz?verbose'; then echo "API Server is not healthy" exit 1 fi # Check Node Status if!kubectlgetnodes|grep-v"Ready"|grep-v"NAME";then echo"All nodes are Ready" else echo"Some nodes are not Ready" kubectlgetnodes exit1 fi sleep20
# Check Core Components if!kubectlgetpods-nkube-system|grep-v"Running"|grep-v"Completed"|grep-v"NAME";then echo"All system pods are running" else echo"Some system pods are not running" kubectlgetpods-nkube-system exit1 fi # Check Component Status if!kubectlgetcs|grep-v"Healthy"|grep-v"NAME";then echo"All components are healthy" else echo"Some components are unhealthy" kubectlgetcs exit1 fi
After verifying that everything is working correctly, we close any open SSH ports on all nodes for security purposes. Initially opened for Ansible configuration tasks, these ports are no longer needed once setup is complete.
If future access is required, you can either modify security groups or use AWS Systems Manager (SSM) to access the EC2 instances.
When the workflow completes successfully, you can download the kubeconfig file to access your cluster. Remember to handle sensitive artifacts carefully—running this workflow in a private repository is strongly recommended.
Key Implementations
Terraform: Provision Resources
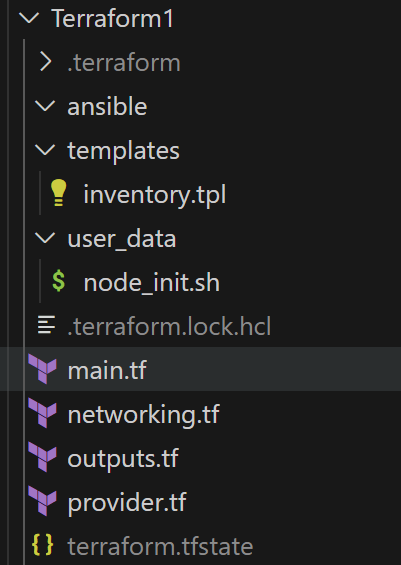
The Terraform configuration is responsible for creating the core infrastructure required for the Kubernetes cluster. The file structure is as follows and includes several key directories:
templates: Contains the inventory template used to generate the inventory file.
user_data: Stores the user data scripts necessary for node initialization.
ansible: Stores the inventory file generated by Terraform.
Networking configurations form the foundation of the infrastructure. Terraform provisions essential resources such as a VPC, subnets, security groups, an internet gateway, and route tables.
For instance, here’s how the VPC and subnets are defined:
# Access to port 6443 temporarily open to all resource"aws_vpc_security_group_ingress_rule""k8s_master_api" { security_group_id=aws_security_group.k8s_master.id
# Inbound from other masters and self resource"aws_vpc_security_group_ingress_rule""k8s_master_master" { security_group_id=aws_security_group.k8s_master.id
# Inbound from workers for flannel networking resource"aws_vpc_security_group_ingress_rule""k8s_master_worker_flannel1" { security_group_id=aws_security_group.k8s_master.id
As a side note, at the end of the workflow, the security groups are modified to close the SSH port on all nodes. You can also customize the security group rules in the Terraform2/networking.tf file to adjust additional settings as needed.
Terraform also provisions EC2 instances for both master and worker nodes, using user_data scripts for node initialization:
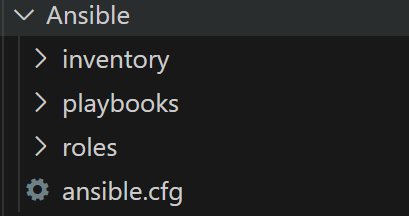
Ansible automates the setup of Kubernetes on all nodes by performing tasks such as installing necessary packages, configuring networking, and initializing Kubernetes components. Its file structure is below.
The roles/k8s_node directory contains tasks for configuring each node:
Note that both containerd and kubelet are configured to use systemd as the cgroupDriver. This ensures consistency in how the container runtime and Kubernetes manage resources. The configuration files for these components are stored in the path ansible/roles/k8s_node/files.
The Ansible playbook follows a structured sequence to configure all nodes, initialize the Kubernetes cluster on the master node using kubeadm, join the worker nodes to the cluster, and install the Flannel network plugin.
-name:Exportkubeconfigfile fetch: src:/etc/kubernetes/admin.conf dest:/tmp/kubeconfig flat:yes mode:'0644' ignore_errors:true # Replace the API endpoint as the master's public IP -hosts:localhost tasks: -name:ReplacetheIPinthekubeconfigfile replace: path:/tmp/kubeconfig regexp:'https://[0-9.]+:6443$' replace:'https://{{ groups["k8s_master"][0] }}:6443'
Hands on
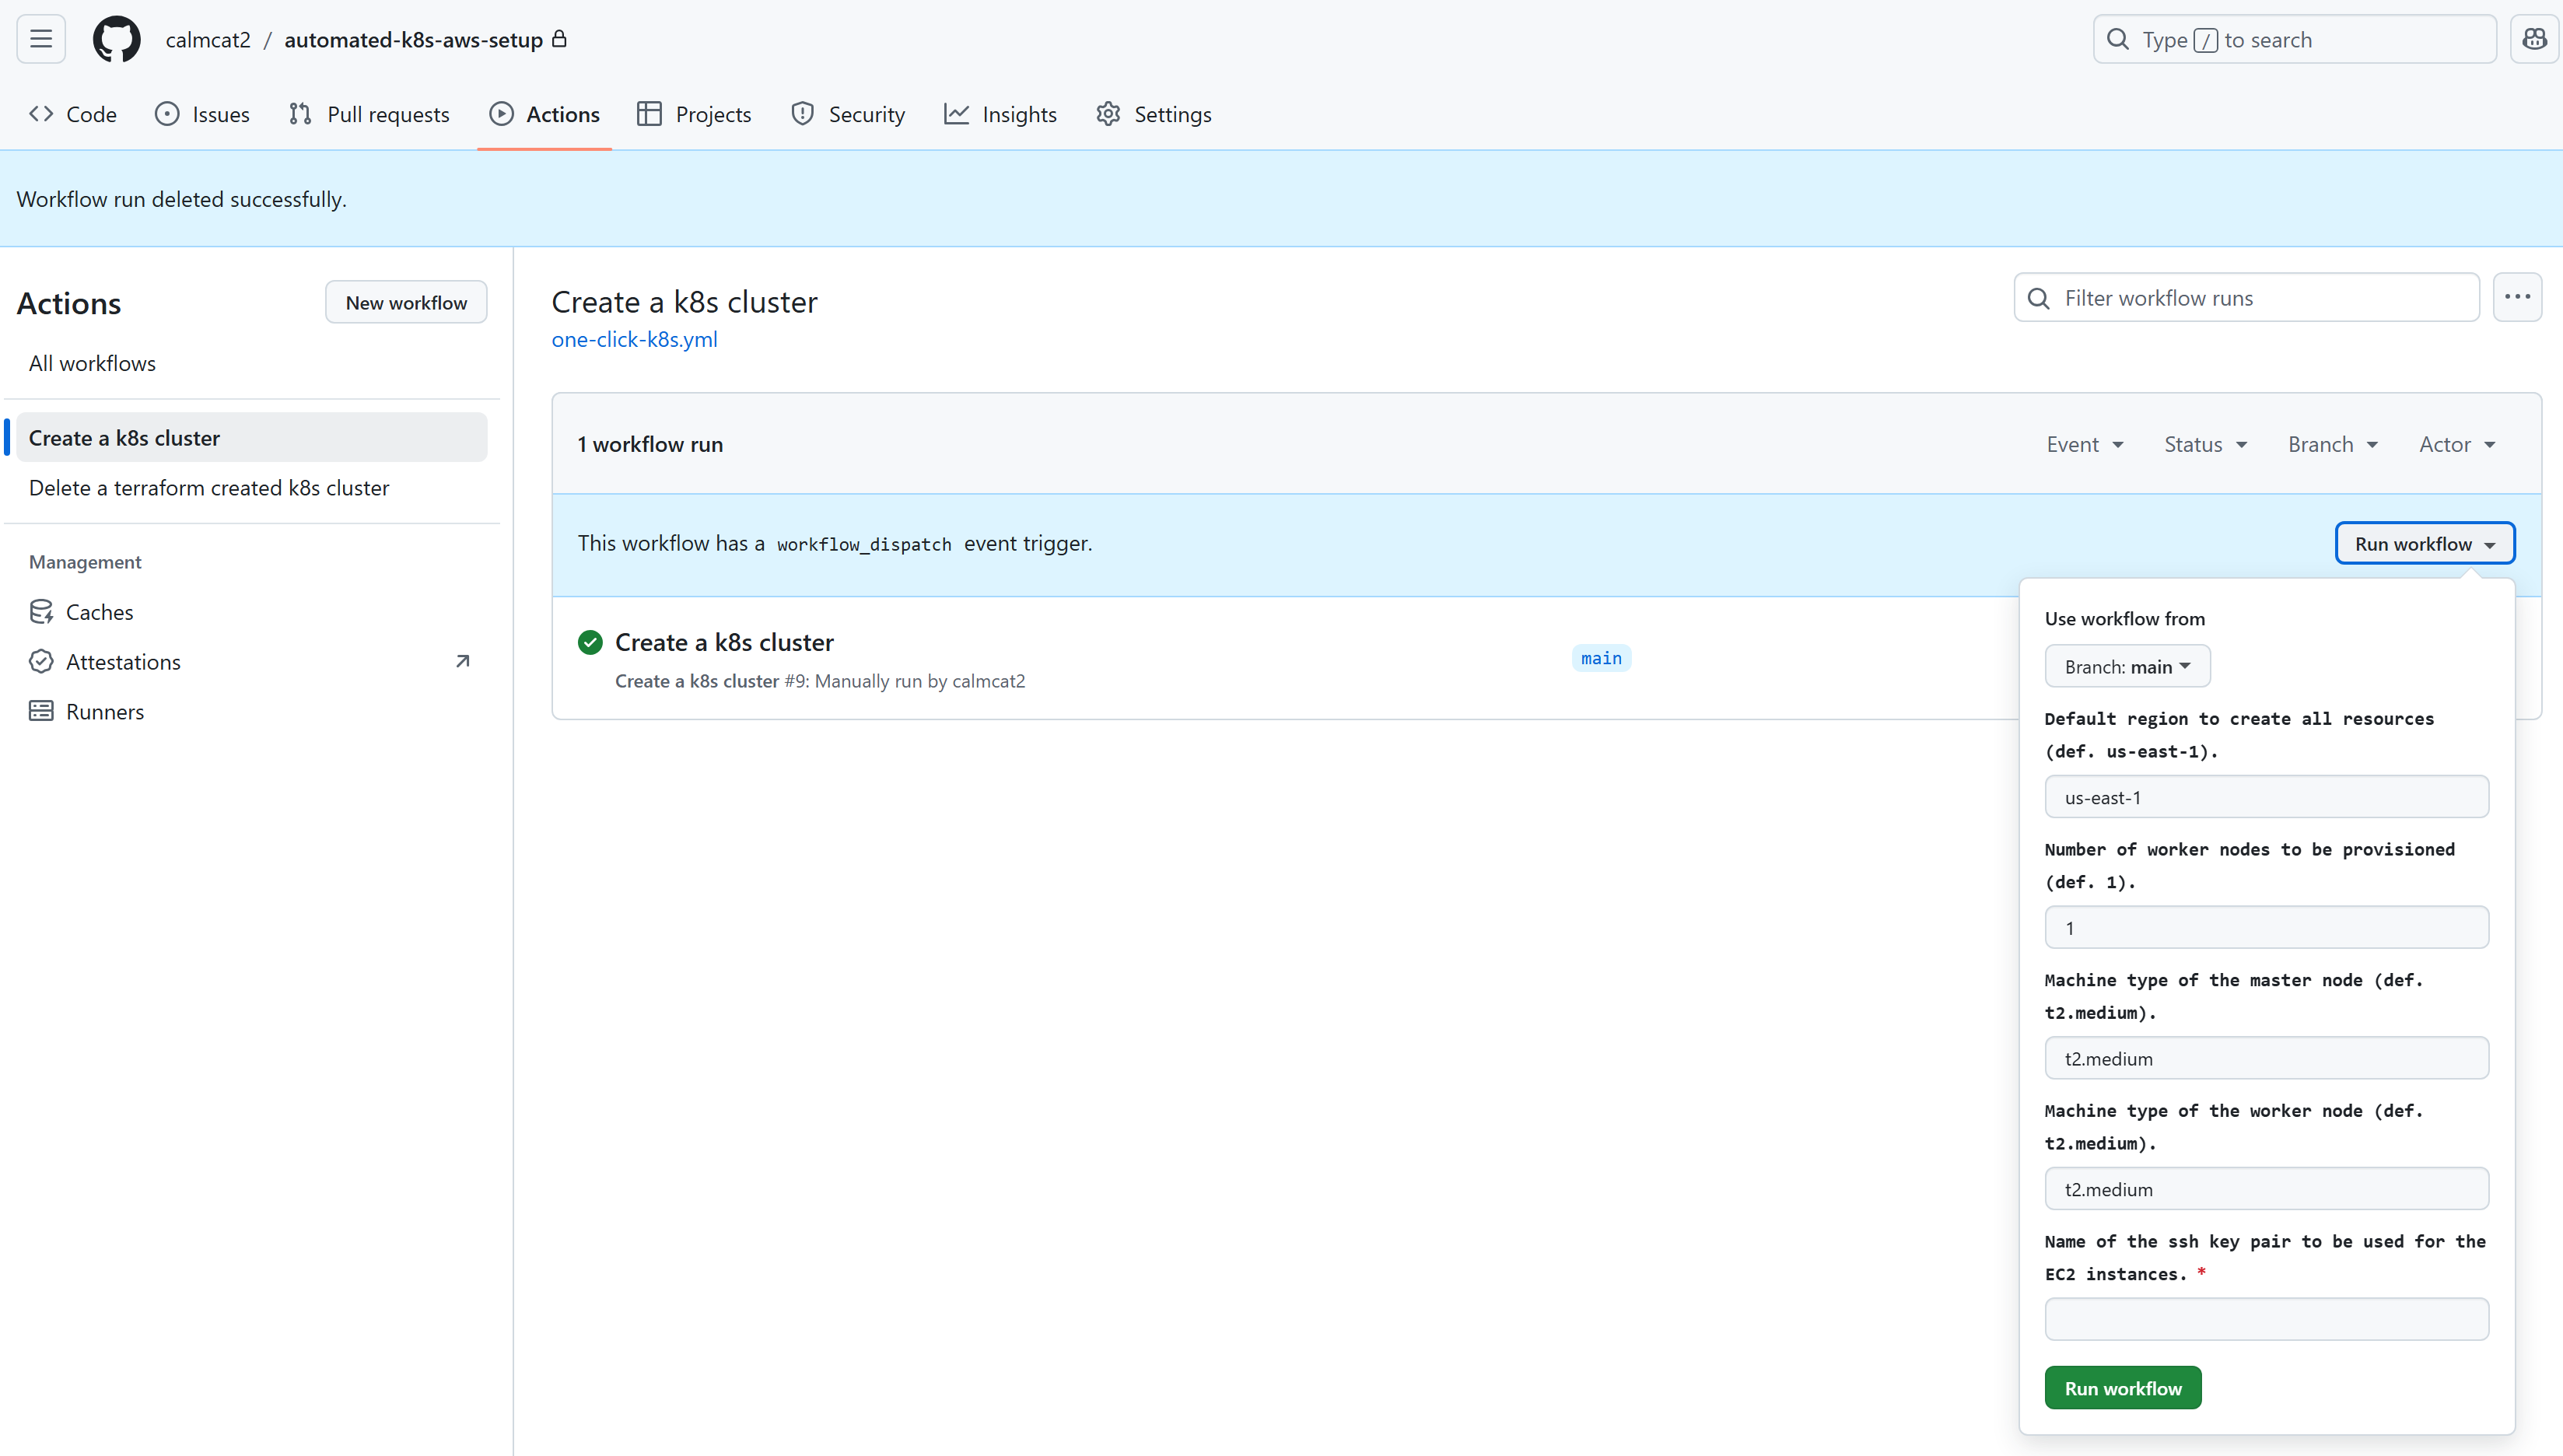
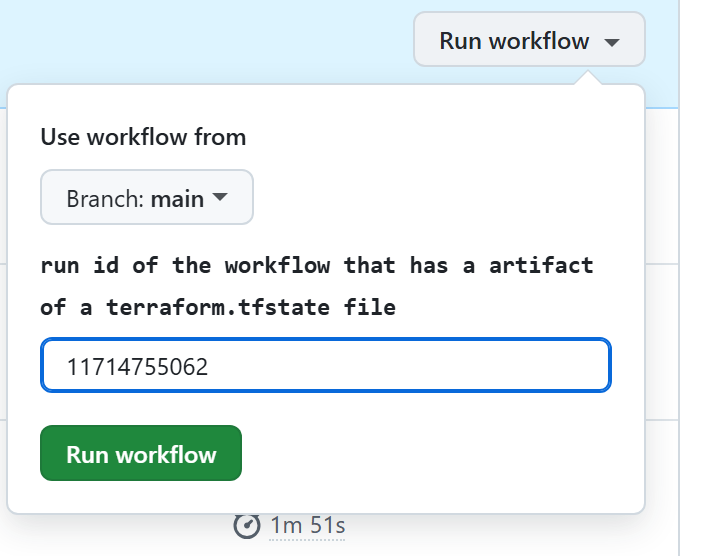
Go to the Actions page in the Github repository and choose the workflow Create a k8s cluster. As shown below, when you click Run workflow, You will be prompted to provide optional customization parameters and the SSH key name.
For example, I need to create a cluster with 2 worker nodes, then modify the second parameter (num_workers) to 2. Next, enter the SSH key name that I previously created in AWS and click Run workflow.
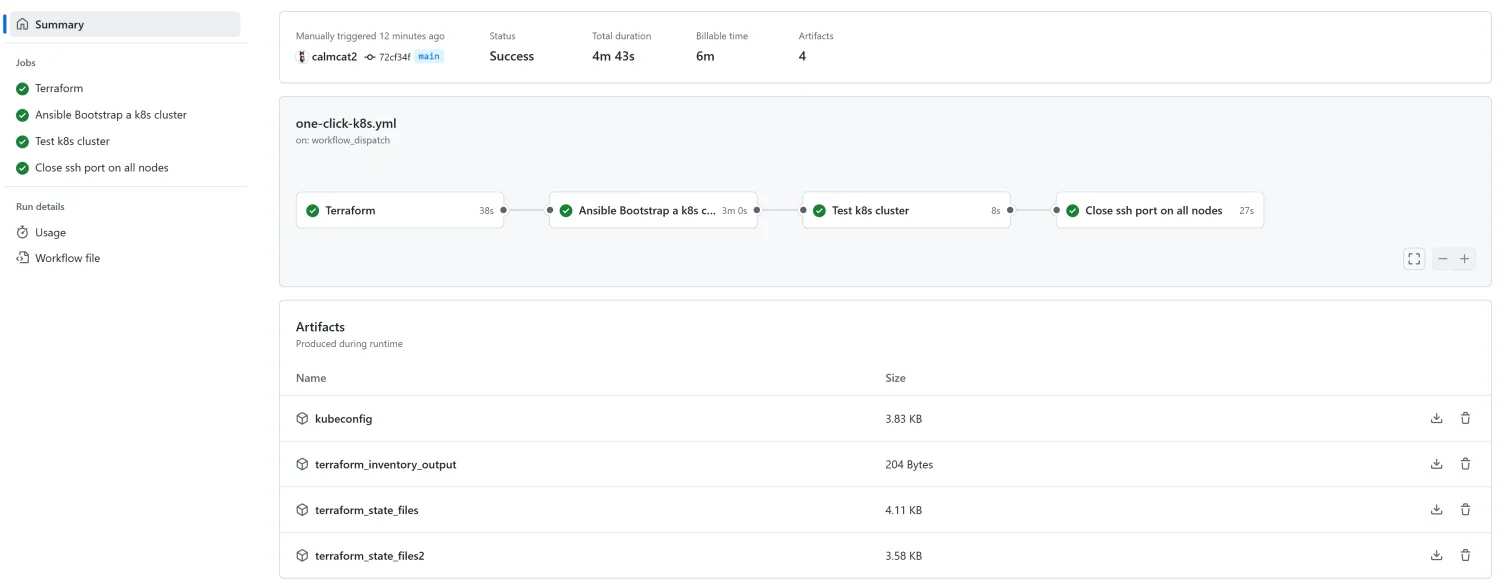
For 4min 43s, a Kubernetes cluster with a single master node and two worker nodes has been successfully created.
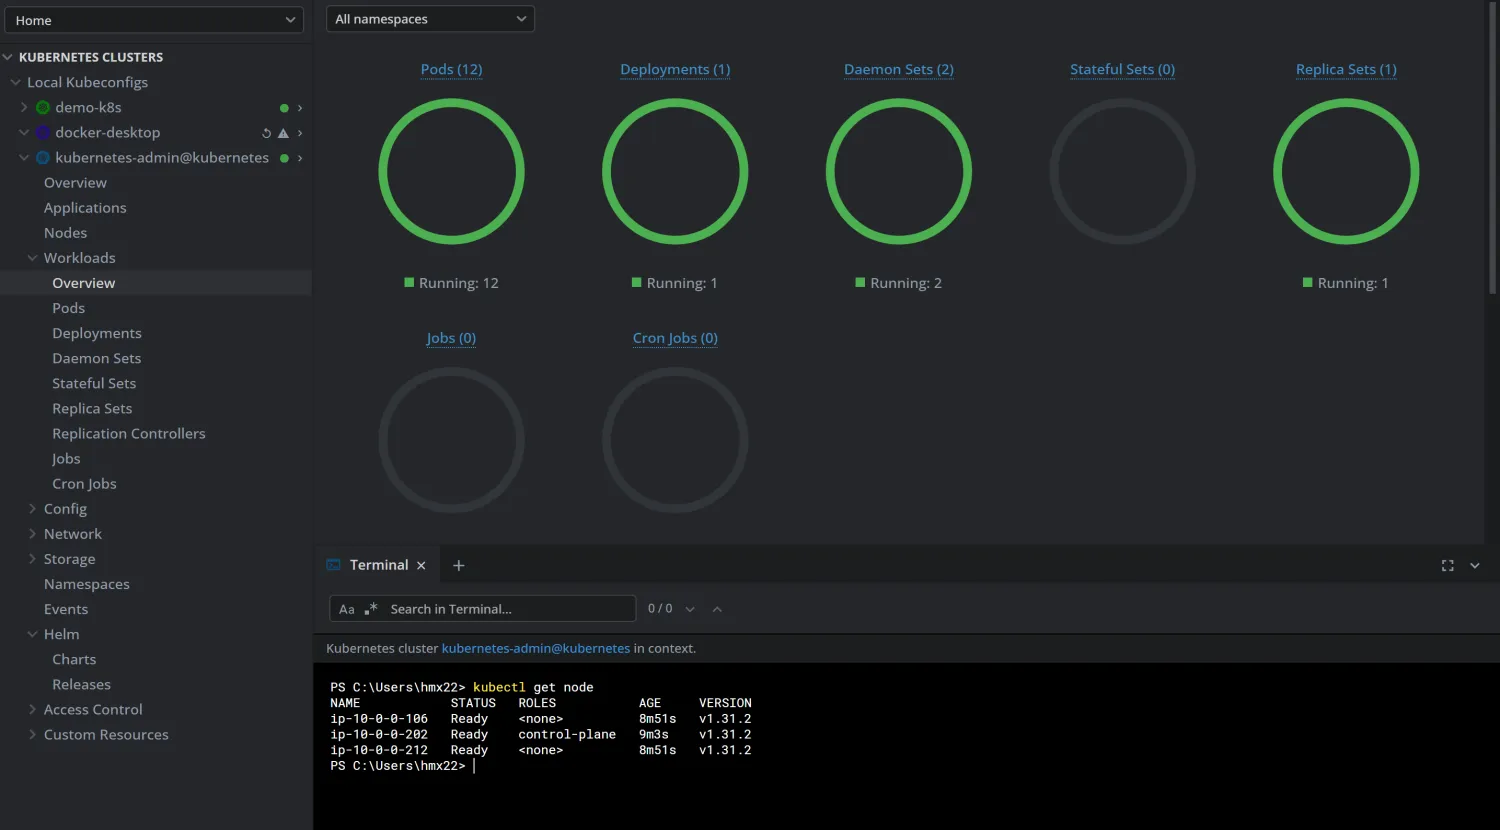
Download the kubeconfig file and access the kubernetes cluster.
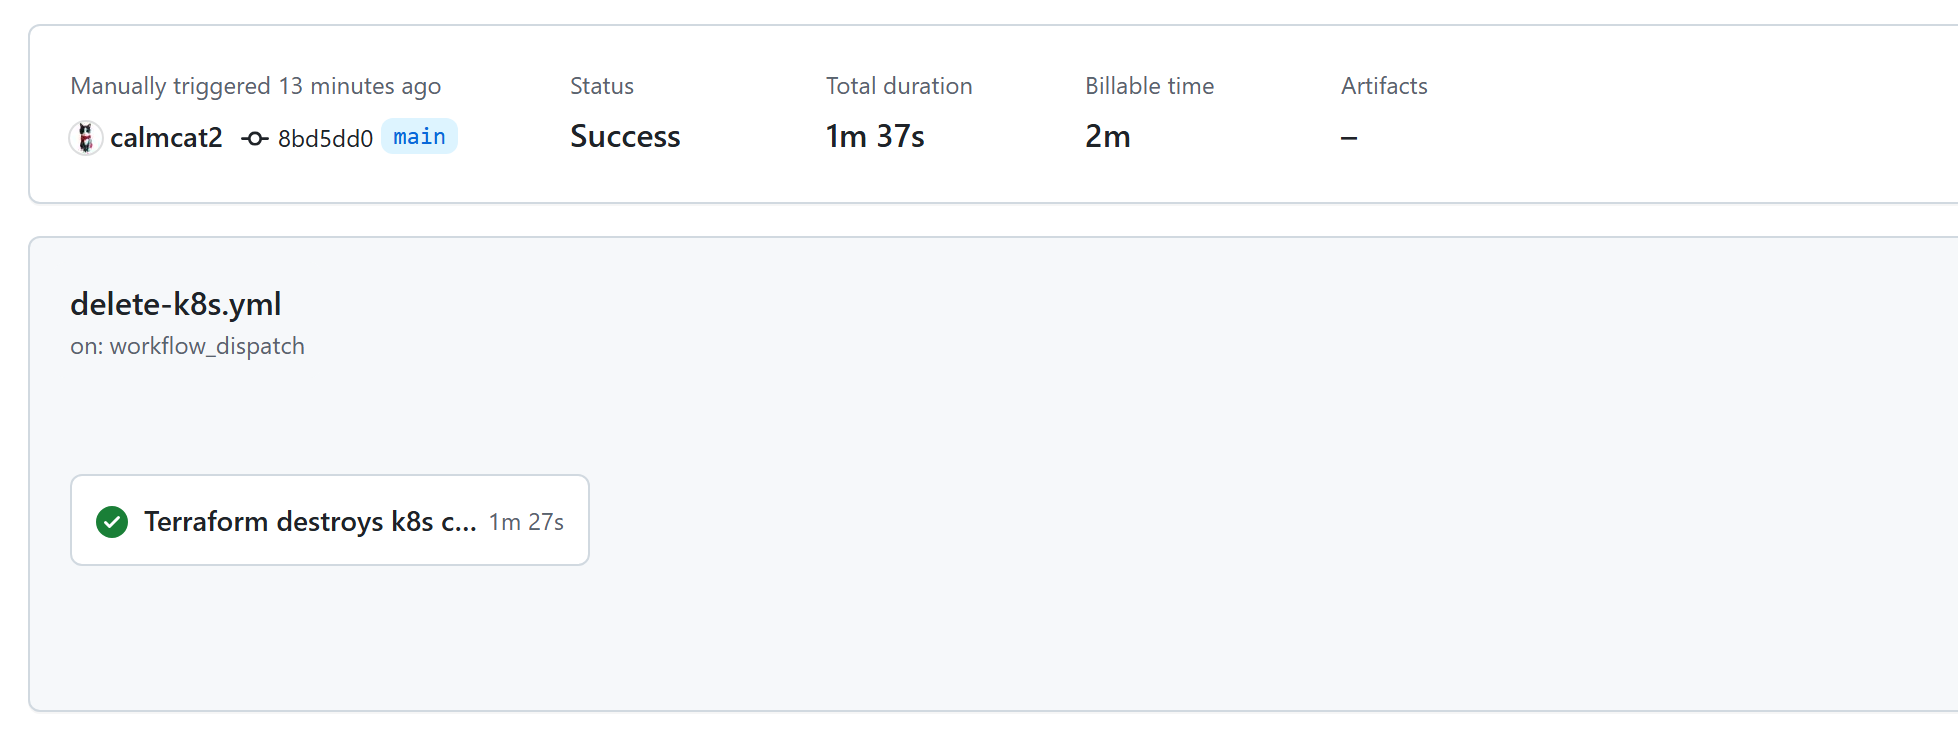
Cluster Deletion
Workflow
The workflow to delete a Kubernetes cluster created by Terraform is straightforward. All you need is the Terraform state file that was generated during the cluster creation process. This file contains the current state of your infrastructure and is essential for Terraform to know what resources to destroy.
There are two ways to provide the Terraform state file to the delete workflow:
Add the state file to the repository:
You can manually add the terraform.tfstate file to a directory Terraform3/ in your repository and push the changes (be sure the repository is not in public view). Then, run the workflow.
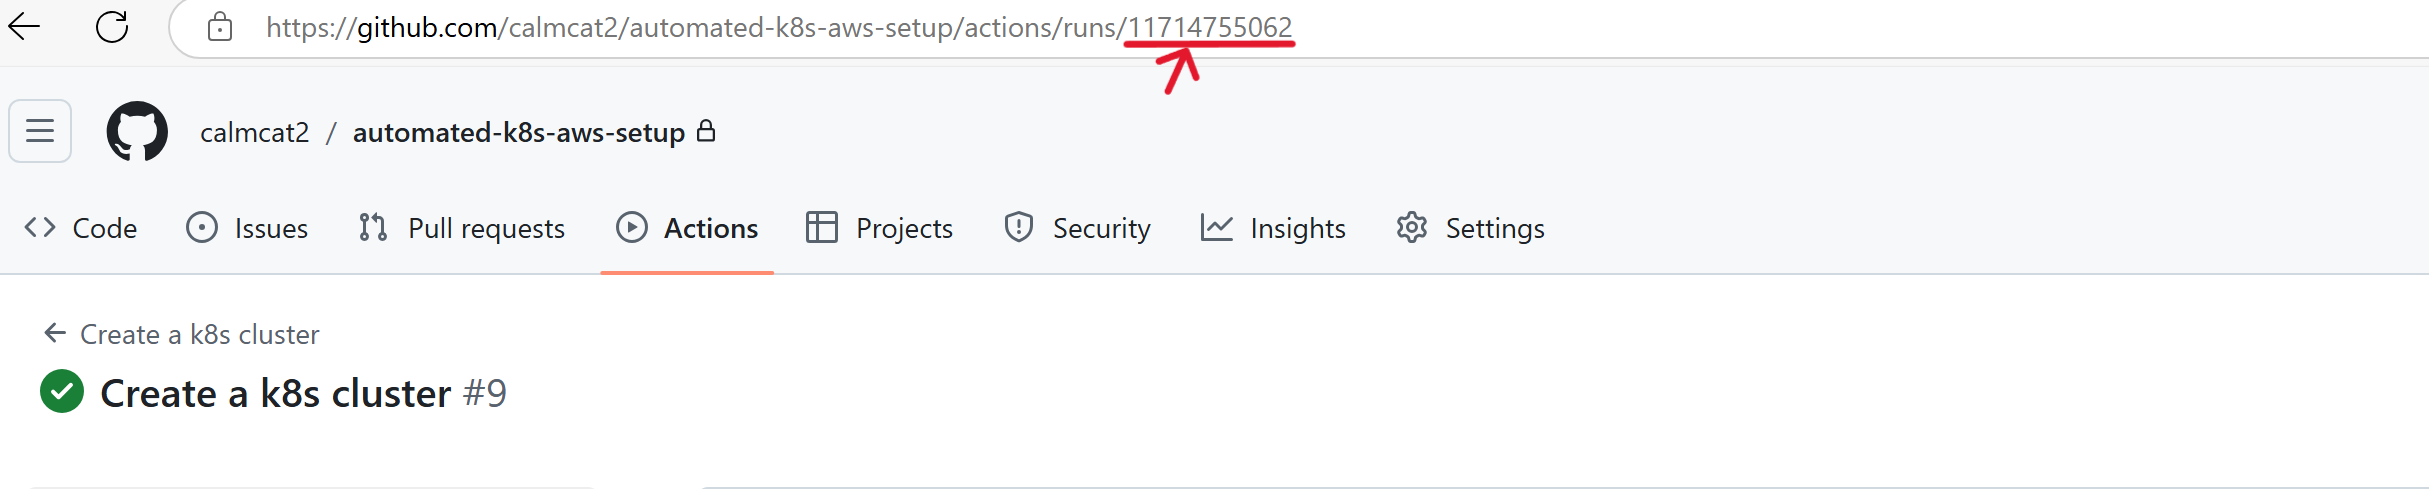
Reuse an artifact from the Create a Kubernetes cluster workflow:
GitHub Actions allows workflows to access artifacts from previous workflows as long as they haven’t expired or been deleted. You can reuse the terraform.tfstate artifact from the earlier workflow that created the cluster.
Here is the workflow code, which is straightforward.